Connecting to Discord
Create AstrBot Discord Platform Adapter
Navigate to the messaging platform, click to add a new adapter, find Discord and click to enter the Discord configuration page.
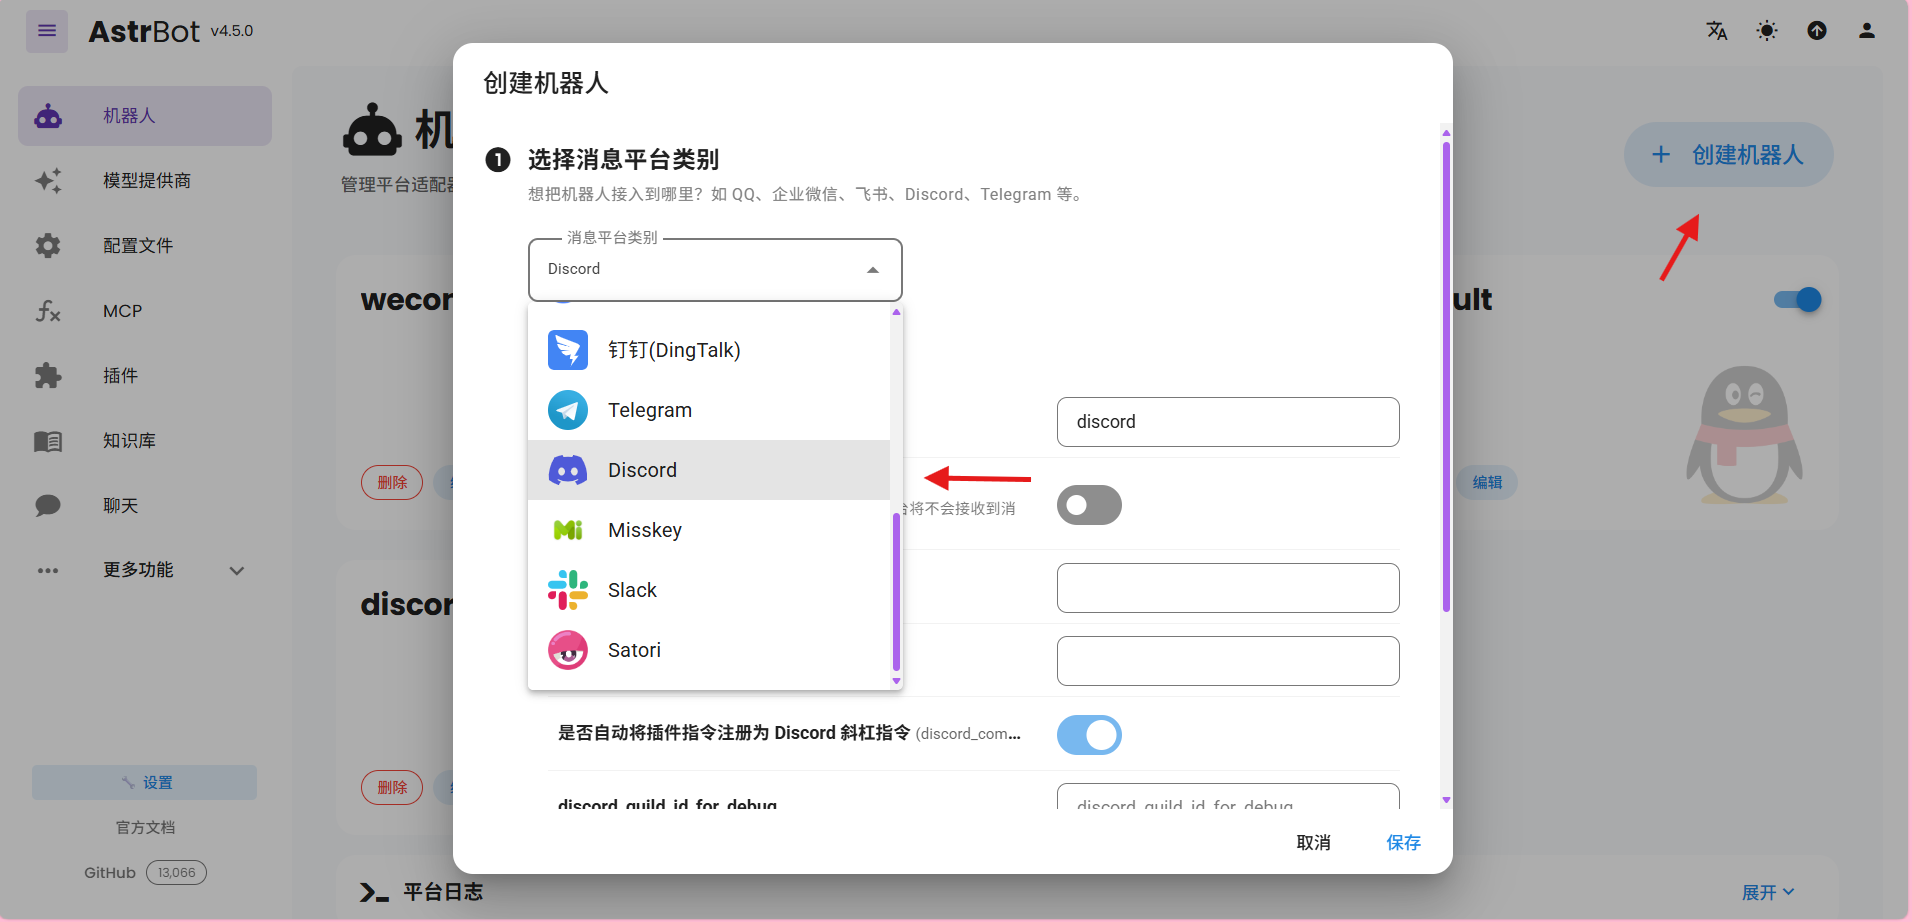
For this tutorial, you only need to configure items 1, 2, 3, and 5
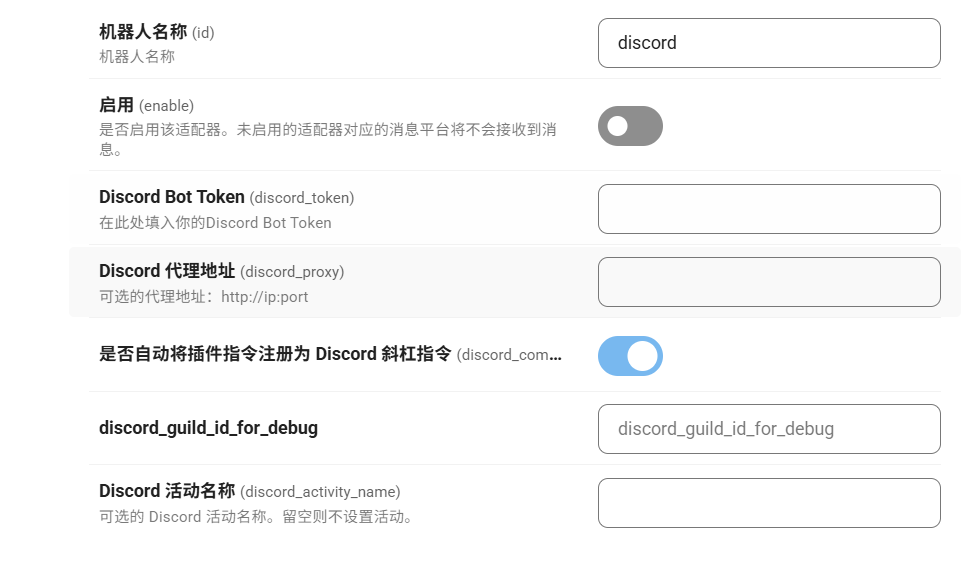
- Bot Name: Customize this to easily distinguish between different adapters
- Enable: Check to enable this adapter
- Bot Token: Token obtained after creating an App in Discord (see below)
- Discord Proxy Address: If you need to use a proxy to access Discord, you can enter the proxy address here (optional)
- Auto-register Plugin Commands as Discord Slash Commands: When checked, AstrBot will automatically register commands from installed plugins as Discord slash commands for user convenience.
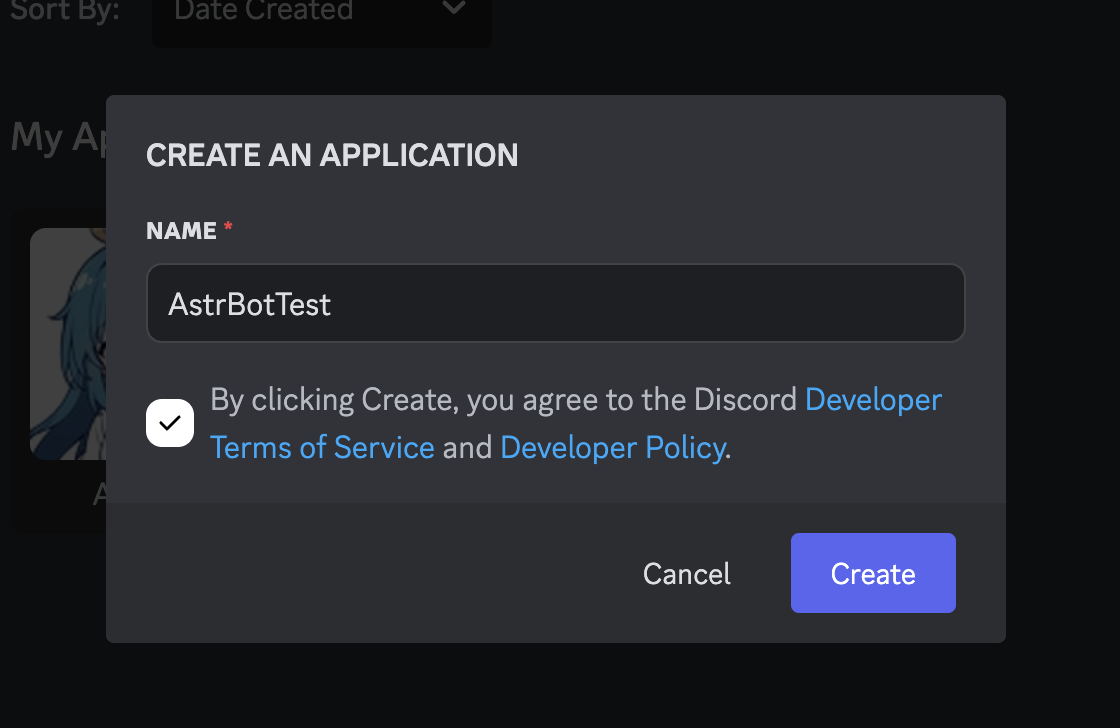
Create an App in Discord
- Go to Discord Developer Portal, click the blue button in the top right corner, enter an application name, and create the application.
- Click on Bot in the left sidebar, click the Reset Token button. After the token is created, click the Copy button and paste the token into the Discord Bot Token field in the configuration.

- Scroll down and enable all three of these options:
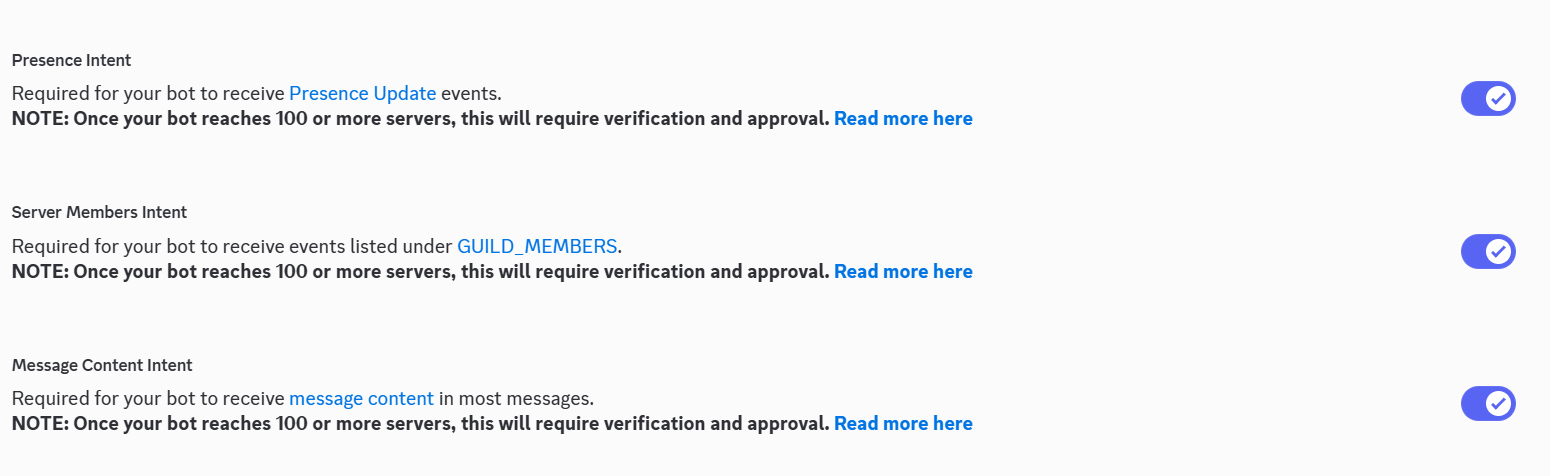
- Presence Intent: Allows the bot to access user online status
- Server Members Intent: Allows the bot to access server member information
- Message Content Intent: Allows the bot to read message content
- Click OAuth2 in the left sidebar, and in the OAuth2 URL Generator, select
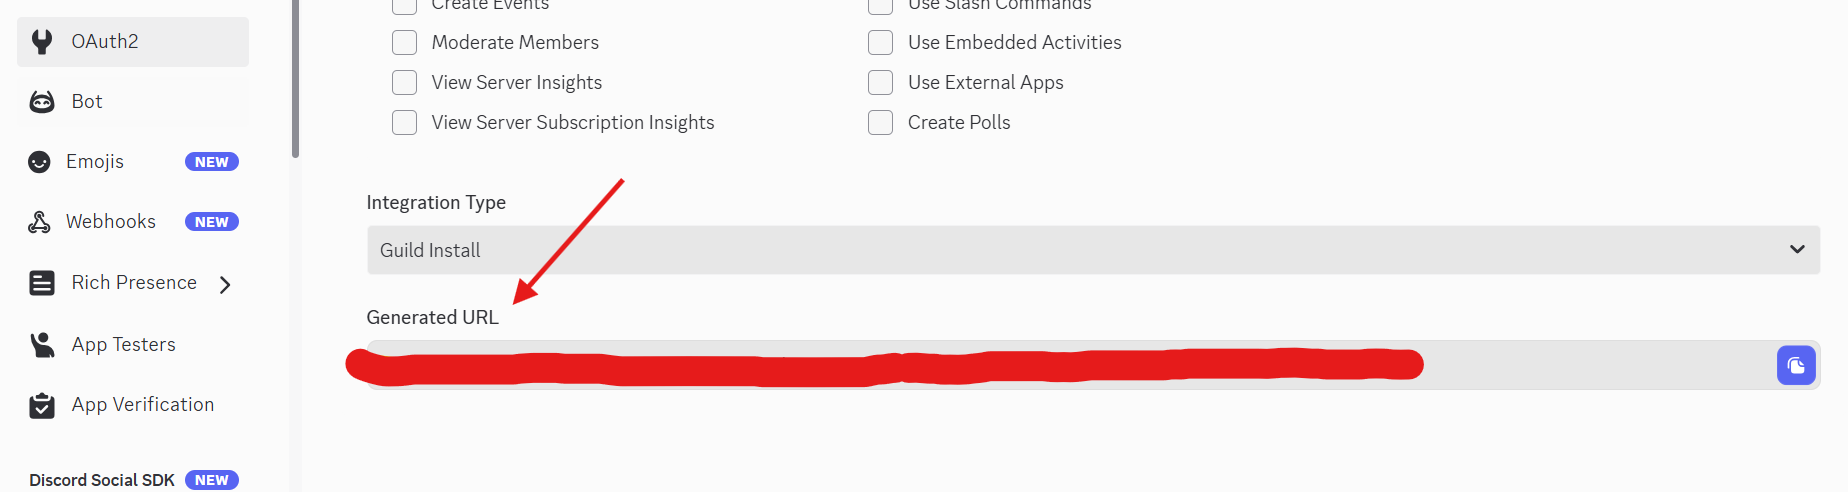
BotLike this: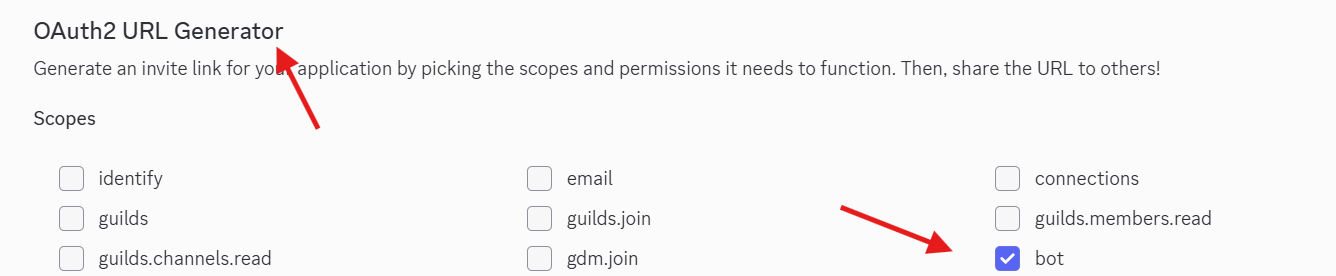 Then in the Bot Permissions section that appears below, select the allowed permissions. Generally, it's recommended to add the following permissions:
 - Send Messages
- Create Public Threads
- Create Private Threads
- Send TTS Messages
- Manage Messages
- Manage Threads
- Embed Links
- Attach Files
- Read Message History
- Add Reactions If you find this tedious, you can directly use administrator permissions, but it's still recommended to use the permissions configured above (or the permissions you specifically need) in your production environment.
Remember, the higher the permissions, the greater the risk.
Copy the Generated URL that appears below. Open this URL to add the bot to your desired server.
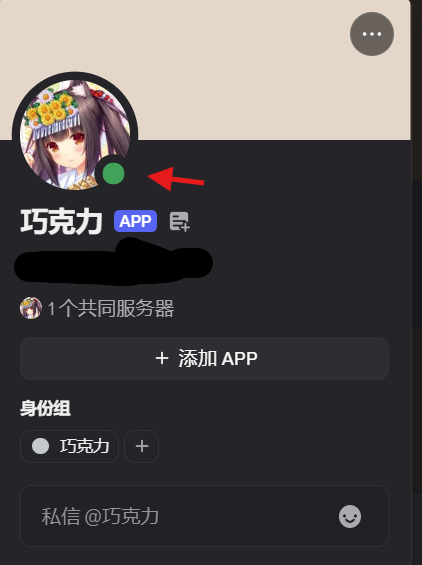
Enter your Discord server, your bot should now show as online
 @ mention the bot you just created (or don't mention it), type
 /help. If it responds successfully, the test is successful.
Pre-acknowledgment Emoji
Discord supports the pre-acknowledgment emoji feature. When enabled, the bot will add an emoji reaction when processing a message, letting users know the bot is working on their request.
In the admin panel's "Configuration" page, find Platform Specific -> Discord -> Pre-acknowledgment Emoji:
- Enable Pre-acknowledgment Emoji: When enabled, the bot will automatically add an emoji reaction upon receiving a message
- Emoji List: Enter Unicode emoji symbols, e.g., 👍, 🤔, ⏳. You can add multiple emojis, and the bot will randomly select one to use
Troubleshooting
- If you're stuck at the final step and the bot is not online, please ensure your server can directly connect to Discord
If you have any questions, please submit an Issue.